Shredz64 – Created a PSX64 Prototype

Lots of good work and news going on with this project, I figured it was about time to actually update this page with what’s going on.
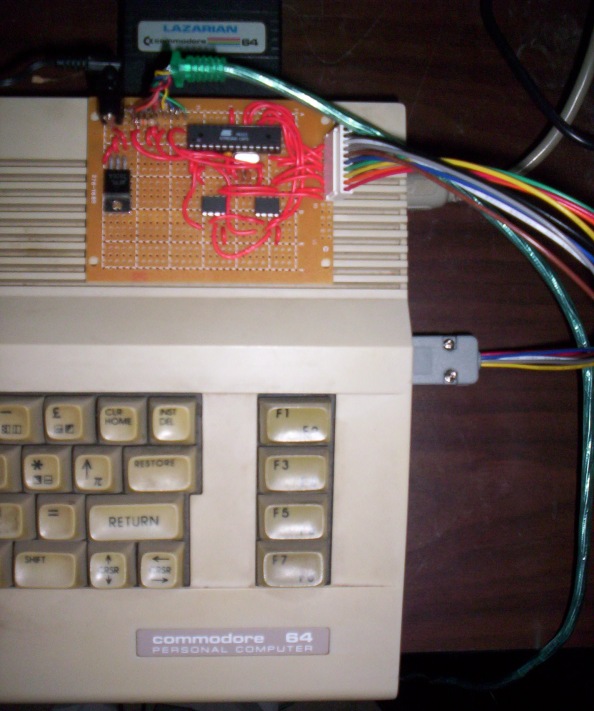
The soldered prototype for the PSX -> C64 adapter is now done, as can be seen here:

The converter now does the following:

1. Determines whether a normal controller is plugged in or a guitar controller, and maps buttons accordingly
2. Turns on analog mode for guitar controller and successfully reads whammy bar. (Updates later about getting this working for all those interested)
3. Maps Strum up, Strum down, and guitar lift up to static values on one of the POT lines, which allows the C64 to receive ALL information from the guitar (except start and select button)
4. Allows button macros to be programmed onto the R1/R2/L1/L2 buttons in controller mode, up to 127 button sequences PER macro
5. If the user selects analog mode on a normal controller, it will map the left analog stick to the normal digital directions
6. And converts all buttons successfully of course.

After a hefty debugging session, the physical adapter is solid and works great with both a guitar controller and normal dual shock controller. It was amazing to try all my old games with a PS2 controller (as well as some Amiga games and Atari 2600, haven’t tried the Sega Master System yet).

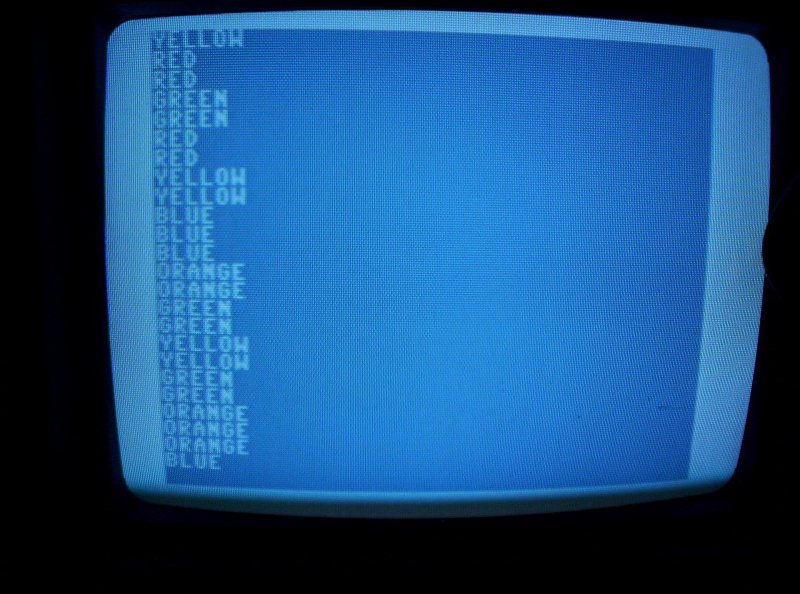
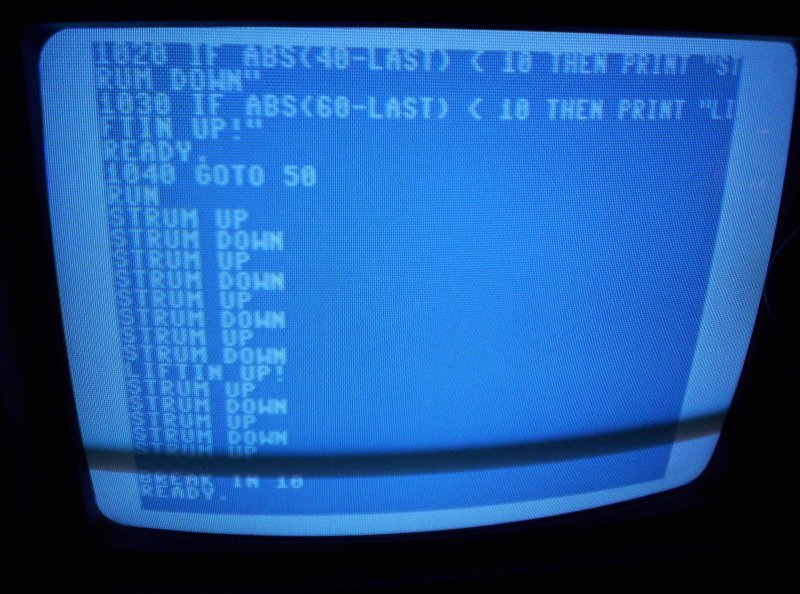
Also, I’ve started writing the actual Shredz64 (guitar hero) game for the C64. I started out with a simple debugging routine to show the status of what guitar buttons were being pressed. Here are two screenshots (literally) of the C64 reporting whats happening on both the fret board and strum bar/lift sensor:

Here you can see me pressing random buttons on the fretboard

And here I’m struming up a down a few times, then I lift the guitar up

While this program was written in BASIC, the final Shredz64 program is being written in a combination of C and 6502 assembly using the CC65 cross compiler, which I got up and running a few days ago. I’m currently developing in an emulator environment and am waiting for parts to arrive to build a cable to transfer the program to the C64 itself for testing.

Anyway, so much more to come, but things are progressing nicely! I’ve found out that this project is featured in Engadget which is great, I hope to be making updates more regularly now that I know people are reading. If you have any questions, feel free to email me: twestbrook AT synthdreams DOT com. Huzzah!

Shredz64 – The Beginning

I recently ordered the arduino development board – it’s a programming board for the ATMEGA8 microcontroller with a built in USB interface. It was extremely cheap (~35 for the board, 3 bucks per ATMega8 chip). The IDE allows you to program in C code and upload it straight to the flash memory on the ATMega, which is called by the bootloader on startup. The ATMega8 is awesome for 3 bucks, it runs at 16mhz, has 1K RAM, 8K flash memory, and 512 bytes of EEPROM memory. Great for a project like this. HOW DOES THIS RELATE TO THE GUITAR HERO CONTROLLER?

Well, long gone are the days when a joystick simply put voltage over a line to indicate a button being pressed. This is true on Atari/Commodore/Sega/Amiga controllers, but nothing recent. Back in the day, if you pressed LEFT, a circuit to a specific pin would be completed on the 9 pin connector. Press up, a different pin would be connected. A pin for every button, it was an easy life. But now PSX, XBOX, GC controllers have a billion buttons and only a limited number of lines, so they encode the data into a serial stream of packets, just like if you were sending data over a serial connection or network.

In comes the ATMega8 microcontroller. The atmega receives the serial stream of packets, decodes them and figures out which buttons are being pressed. It then drops voltage on corresponding lines to the output to the commodore. But before I did that I had to test to make sure my decoding program was working! THIS WAS A NEAT TEST.

First I took a PSX extender cable:
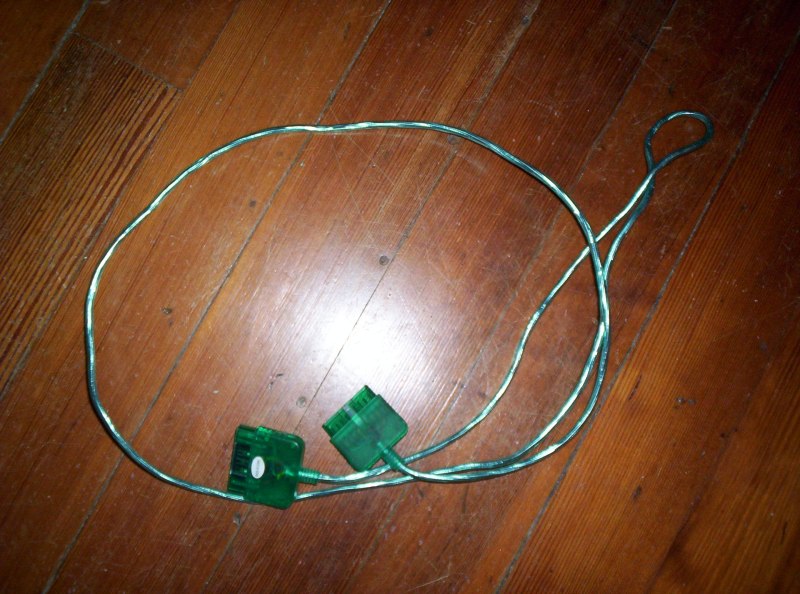
I opened the male connector and got the pins out. I continuity tested each line so I could figure out which color was which pin. I then connected these pins into a solderless protoboard and mapped arbitrary pins off the arduino board into the protoboard.
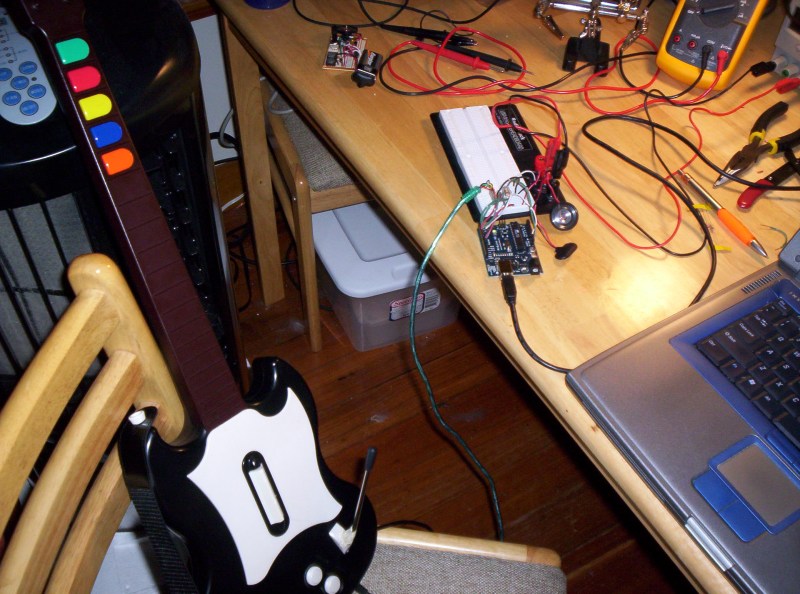
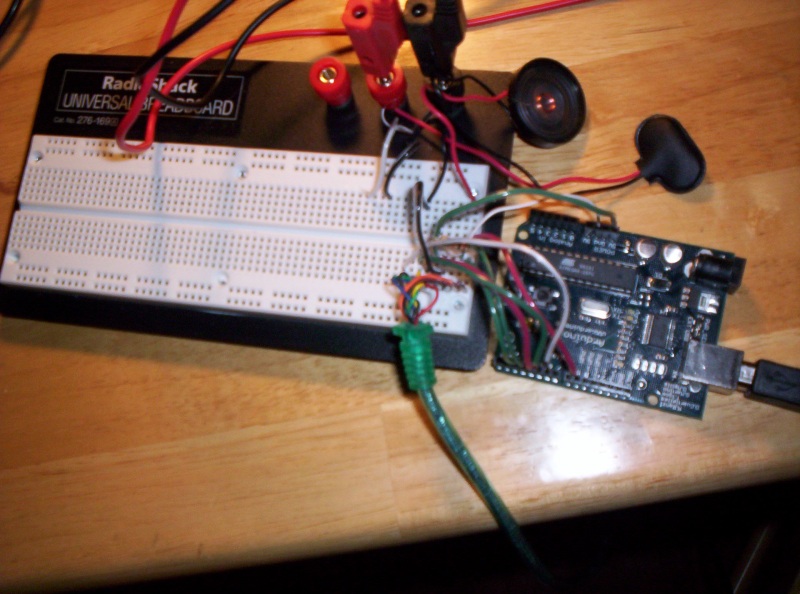
I also hooked a tiny loudspeaker up to the protoboard too and mapped the arduino into it. The goal to test this guy out was to have the ATMega play sounds on the speaker when I strummed with buttons held down on the guitar.

Then was the task of writing the decoder in C. I found some docs online that describe the protocol the PSX controller uses. It basically consists of sending data over a COMMAND line, listening on the DATA line, manipulating the CLOCK line to drive the data, checking the ACK line for good measure (not really necessary), and dropping the ATTENTION line when it was time to wake the controller up. The prototal was the following. Drop the attention line, Send 0x01 over the COMMAND line to the controller, the arduino should receive 0xFF back on the data line. Then the controller is sent 0x42 which is a REQUEST FOR DATA command, at the same time the controller responds back with what mode it is in (Digital or Analog, mouse or whatever). It then sends back 0x5A to indicate “Here comes the data SUCKA”, and then sends 2-7 bytes depending on if the controller is in digital or analog mode. Those bytes contain a bit for each button, either set to 0 or 1 depending on if the button is pressed or not.

It took about two days to get this working, one because I needed to add a 10K pullup resistor across the COMMAND pin as the arduino was polling the controller too fast and the line noise was crapping out any packets I was sending. I found this tip online by someone who had done another PSX controller project. The other was I wasn’t reading and writing data properly with the clock cycle, I was doing more on the rise of the clock and I needed to do things on the fall of the clock. It was frustrating, but eventually I got it working. I then wrote a quick program to print out to my laptop (via the USB serial link) what button was being pressed, then I pressed each button on the guitar controller and saw what the corresponding PSX button was. Here’s THAT:

Green = R2
Red = O
Yellow = Triangle
Blue = X
Orange = Square
Start = Start
Select = Select
Lift guitar up = L2
Strum up = UP
Strum down = DOWN

I couldn’t test the whammy bar out as I know for a fact it manipulates one of the analog sticks, and I don’t know the command yet to force a controller into analog mode, so the guitar starts up in digital mode and disables the whammy bar.

Anyway, I got the decoder working, and using the button map data, I created a little program for the atmega that plays a note through the loudspeaker when the strum bar is hit depending on what key combination is held down during the strum. It basically assigns a frequency value to each key, then adds them together, and plays that. It’s not aligned to real notes right now, I did it more for just a fun test to actually see the thing working. There really is no other steps between here and hooking it to the commodore 64 other than wiring up a DB9 conector.

Here is a recording of me playing the Guitar Hero controller through my interface – Remember, this is NOT what the Commodore 64 game will sound like, this is just a quick hardware test.

That’s it for now! Soon the interface will be done and it will be time to start on the game.
TFNN – Major changes

I thought I’d sit down and update – it’s not that I haven’t been working a lot on TFNN, I just haven’t had a chance to sit down and actually write about it!

Firstly, I implemented crude, neuron-global neuromodulator code a week ago or so. It worked under my very specific test cases, but it didn’t really accurately model how dopamine, serotonin, or norepinephrine function on the whole. I realized there was a lot of neuron-global code that really should have been axon-terminal/synaptic cleft/postsynaptic receptor specific. Can’t write too much about it, but yesterday I rewrote a lot of code dealing with neuromodulators and synapse processing so it more closely dealt with activity on the receptor level and not on the neuron level. I ran test cases with both an inhibitory and excitatory neuromodulator, both were success.

Right now however, neuromodulators will blindly increase or decrease the effect of a neurotransmitter. I would like to include code that discerns between a glutamate excitatory reaction and a GABA inhibitory reaction, and selectively affects only one.

TFNN – Neuromodulators

A quick update while I’m thinking about – next time I sit down with the code I want to add a section to emulate the functionality of dopamine cells like those found within the ventral tegmental, and other neuromodulators. This is actually a major enhancement and something to give careful thought to before proceeding. At first I intended TFNN matrices to operate without global or semiglobalized synaptic modulation – IE the tfnn matrix would operate purely on the “mechanical nature” of electro-chemical reactions in axodendritic, axosomatic, and axoaxonic connections – no globalized chemical reactions within the system.

The more I study though, the more I realize how important dopamine and other neuromodulators are in the prefrontal cortex regions. Via message controlled signals, these modulators can facilitate GABA reactions, and hence temporarily “quiet” certain systems, allowing for concentration. I have a feeling that without dopamine emulation matrices would fall prey to a ubiquitous ADD of sorts, and perhaps fail to mold meaningful neural configurations in deeper matrices due to an overload of traffic on neural bridges coming from sensory thalami and cortices.

At first when I was kicking it around I was thinking of just modifying axoaxonic connection code to introduce a negative change to synaptic weights and have that emulate dopamine secretion. This isn’t accurate though, as dopamine is a modulator, not a permanent change to the synaptic weights.

I think this may call for another variable to be introduced into the neuron, one that keeps track of current affecting modulators. More space – but I also realize I have an unused integer currently in the neuron that I used during debug sessions, I’ll remap that for dopamine / other modulator use. I may use it or another variable in connection to track glutamate supply to emulate habituation effects as well. It will add very little additional calculation time.

It’s amazing how large the TFNN neuron has grown in complexity from when I first completed the code until now.

TFNN – Another step down

Another quick update – I fixed some synapse timing issues in the Temporal Frame engine and finished up the axoaxonic code this weekend. I had a succesful test of sensitization as well, demonstrating the non-Hebbian learning capabilities of a neural matrix. Due to axoaxonic connections, a presynaptic neuron can now cause a direct increase in the synaptic weight of the postsynaptic neuron’s axon terminal (This postsynaptic neuron itself being a presynaptic neuron in another relationship).

The test was performed by generating a 3 neuron matrix. Milo’s left touch sensor was sent as input into neuron 1, while Milo’s right touch sensor was sent as input into neuron 2. Neuron 1 was connected via an axoaxonic connection to neuron 2’s axon terminal – the axon terminal creating the synapse between neuron 2 and neuron 3 in a standard axodendritic configuration. Neuron 3’s output was sent to Milo’s speaker.

The treshold rate of Neuron 3 was set higher than the synaptic weight between neuron 2 and 3, hence if Milo’s right antenna was pressed he would not beep. However, upon touching Milo’s left antenna a few times, via the phenomenon of sensization the synaptic weight between Neuron 2 and 3 was increased, and subsequent pressings of Milo’s right antenna was enough alone to cause Milo to beep, now the synaptic weight had grown strong enough to pass Neuron 3’s threshold.

Cool stuff!

TFNN – Axoaxonic Issue

I realized something today when I started fleshing out axoaxonic connections a bit – something about a flaw in the temporal frame engine itself. I can’t go too much into it, but I don’t think I would have realized it unless I had realized about axoaxonic connections, so I’m glad things worked out the way they did. It’s a fairly easy fix, so that’s good.

Also, I read a few papers on QBT (Quantum Brain Theory), and it seems like most reputable neurophysiologists don’t really buy it, and from what I’ve read I don’t really buy it either. The size and effect of the electrochemical reactions just don’t seem to leave any room for the very microscopic-natured effects of quantum mechanics, even if microtubules are a place where the magic could happen.

So, first things first, mend the engine, then I can go ahead and add habituation and sensitization effects.

TFNN – Associative Learning

This was cool, I had the first successful test of associative learning last night with a test matrix.

Just to explain what associative learning is for a second – behaviorist and neurophysiological studies have shown the following: A stimulus not normally associated with an action can become associated if that stimulus is caused simultaneous to another stimulus that IS associated with an action. EG if you shock a rat’s foot, the amygdala will process this and send a message to motor control to jump away. If you make a sound – a clap or a beep, whatever, the amygdala doesn’t perceive that as a threat so the rat does nothing. However, if you continually clap at the same time you shock the rat’s foot, the rat’s amygdala begins to associate the pathways involved with hearing a clap with those of receiving an electric shock, and hence in the future, JUST a clap will cause the rat to jump in the air as it thinks pain is coming.

On a neurophysiological level, in the lateral amygdala (in this example), there is a preexisting STRONG synaptic connection between the portion of the brain that receives the electric shock and the part the motor control that causes the rat to jump. There is a WEAK connection between the auditory thalamus and cortex and the part of motor control that causes the rat to jump – normally a clap wouldn’t cause it to jump.

However, due to Hebbian learning (triggering of NMDA receptors causing an influx of calcium that cause a genetic reaction to strengthen the synapse between the pre and post synaptic neuron), whenever the POST synaptic neuron fires off as a RESULT of a presynaptic neuron, the synapse between the two neurons is STRENGTHENED. Normally the connection between the auditory thalamus and the motor control via the LA is WEAK and not enough to cause the aymgdala neurons to fire off. However, if the rat receives a shock at the same time as it hears a clapping noise, then both the STRONG and the WEAK connections are fired over – which triggers the post synaptic neuron. Since the WEAK connection was a cause, albeit a small one that led to the post synaptic neuron to fire, its connection is now STRENGTHENED, so now (well, after a few times) its a STRONG connection like the shock neurons, so now clapping causes the rat to jump without a shock to the feet.

Anyway, that was the explanation – and I successfully tested this out in a minimatrix last night. I created a 3 neuron matrix. 2 input neurons, one output neuron. I connected the first input neuron to Milo’s left touch sensor, I connected the second input neuron to Milo’s right touch sensor, and I connected the output node to Milo’s speaker. I then created a strong synaptic link between neuron 1 and neuron 3, and a WEAK synaptic link between neuron 2 and neuron 3. Hence, touching milo’s left antenna would cause him to beep, but touching his right one did nothing. Then I began touching both his left and right antennae simultaneously a few times. The synapse involved in the right synapse grew stronger, so after this action I was able to touch JUST his right antenna and Milo would beep – he had grown to associate beeping with his right antenna whereas before he only associated beeping with his left antenna.

Awesome stuff!

Also, I have to run, but a few things I realize I’ve forgotten to include in the neuron functionality (I keep saying I’m done, I’m not even going to say that anymore, everday I realize more stuff I want to do)

FIRST: I need to fix the Hebbian algorithm as outlined above. Due to technical programming stuff it strengthens the synaptic links in an exponential fashion right now instead of a linear one. It’s easy to fix, I just need to do it.

Also, I wan to incorporate non-hebbian learning like Habituation and Sensitization. Habituation will be easy (from what I gather), it’s simply a depletion of neurotransmitters such as glutamate from the neuron, hence the neuron becomes less effective after repeated use – the overall effect being desensitization.

Sensitization requires the creation of axoaxonic connections (Axons that form synapses with other axons). As of right now the TFNN wasn’t built to handle this situation – but the awesome part is, the code that stores the synaptic gap information can easily be modified to fit pretty much ANY situation. So regardless of what lies on the other side of a synapse, the TFNN can handle it, which is pretty awesome. Had to pat myself on the back for that engineering. ๐Ÿ˜‰

Anyway, enough for now.

TFNN – Terminology update

Just a quick note – I need to think up a name for the visualization routine – the problem is it doesn’t strictly show the same activity of a functional MRI scan, but it also doesn’t show the same activity as a PET or SPECT scan. Something to think about, not really a big deal in the grand scheme of things.

TFNN – Functionality Addon

Also, while I’m thinking about it, I would like to include functionality of post-synaptic generated neurotrophins leading to axon growth and branching within the presynaptic neurons. This will be pretty easy, in the code used to increase synaptic weight, I can also setup new synaptic connections to geographically neighboring neurons. I’m not sure at what rate to do this though, from the literature it suggests it doesn’t happen as often or as quickly as synaptic reinforcement.

TFNN – Hebbian Rewrite

Just a quick update today, no pictures.

I took out the old, incorrect synapse alteration routines today and replaced them with the new routines which match the functionality of Hebbian Learning’s “Fire Together Wire Together”. I actually used a different, more efficient algorithm than what I had originally planned, so the drop in speed is nothing at all. It did increase the size (in bytes) of each neuron, but speed is more a problem than space at this point.

Now that this is finished, all the underlying functionality is (to my knowledge) correct. From this point onward it’s simply a matter of testing different methods of construction with different values for threshold rates, plasticity level, degredation amount, physical placement, etc.

Also, I would like to take a day and just sit down with the code and see if I can get it any more efficient. Right now when I start generating neural matrices in the tens of thousands level, along with a high synaptic density, the thing just grinds to too much of a halt, though this may be OpenGL processing all the graphical representation of the net and not the net taking that time up itself. I will test it out without the graphics routine running and see how it does.

But regardless more efficient code is always a good thing. I know some places where I used a little more memory than I needed and added a few extra steps, I can shave it down a bit.

Everything’s going great though! Once I activated the Hebbian routines activity no longer followed a systematic pattern, or at least I couldn’t see one – which I believe is a very very good thing.