
Category Archives: Network Administration

Converting Your Corporate Intranet to Drupal

Though I have fun working on SynthNet and other projects at night, during the day I fill the role of mild-mannered network administrator at the Manchester-Boston Regional Airport (actually, the day job is quite a bit of fun as well). One of the ongoing projects I’ve taken on is adding all of our various Intranet-oriented services into a single platform for central management, easier use, and cost effectiveness. As mentioned in a previous article (linked to below, see NMS Integration), I knew Drupal was the right candidate for the job, simply due to the sheer number of modules available for a wide array of functionality, paired with constant patching and updates from the open source community.  We needed a versatile, sustainable solution that was completely customizable but wasn’t going to break the bank.

The Mission

The goal of our Drupal Intranet site was to provide the following functionality:

  1. PDF Document Management System
    1. Categorization, customized security, OCR
    2. Desktop integrated uploads
    3. Integration with asset management system
  2. Asset Management System
    1. Inventory database
    2. Barcode tracking
    3. Integration with our NMS (Zenoss)
    4. Integration with Document Management System (connect item with procurement documents such as invoices and purchase orders)
    5. Automated scanning/entry of values for computer-type assets (CPU/Memory/HD Size/MAC Address/etc)
    6. Physical network information (For network devices, switch and port device is connected to)
    7. For network switches, automated configuration backups
  3. Article Knowledgebase (categorization, customized security)
  4. Help Desk (ticketing, email integration, due dates, ownership, etc)
  5. Public Address System integration (Allow listening to PA System)
  6. Active Directory Integration (Users, groups, and security controlled from Windows AD)
  7. Other non-exciting generic databases (phone directories, etc)

Implementation

Amazingly enough, the core abilities of Drupal covered the vast majority of the required functionality out of the box.  By making use of custom content types with CCK fields, Taxonomy, Views, and Panels, the typical database functionality (entry, summary table listings, sorting, searching, filtering, etc) of the above items was reproduced easily.  However, specialized modules and custom coding was necessary for the following parts:

  1. Customized Security – Security was achieved for the most part via Taxonomy Access Control and Content Access.  TAC allowed us to control access to content based on user roles and categorization of said content (e.g. a user who was a member of the “executive staff” role would have access to documents with a specific taxonomy field set to “sensitive information”, whereas other users would not).  Additionally, Content Access allows you to further refine access down to the specific node level, so each document can have individual security assigned to it.
  2. OCR – This was the one of the few areas we chose to delve into a commercial product.  While there are some open source solutions out there, some of the commercial engines are still considerably more accurate, including the one we choose, ABBYY.  They make a Linux version of the software that can be driven via the shell.  With a little custom coding, we have the ABBYY software running on each PDF upload, turning it into an indexed PDF.  A preview of the document is shown in flash format by first creating a swf version (using pdf2swf), then using FlexPaper/SWF Tools.
  3. Linking Documents – This was performed with node references and the Node Reference Explorer module, allowing a user friendly popup dialogs to choose the content to link to.
  4. Desktop Integration – Instead of going through the full steps of creating a new node each time, choosing a file to upload, filling in fields, etc, we wanted the user to be able to right click a PDF file on their desktop, and select “Send To -> Document Archive” from Windows.  For this, we did end up doing a custom .NET application that established an HTTP connection to the Drupal site and POSTed the files to it.  Design of this application is an article in itself (maybe soon!).
  5. Barcoding – This was the last place we used a commercial product simply due to the close integration with our barcode printers (Zebra) – we wanted to stick with the ZebraDesigner product.  However, one of the options in the product is to accept the ID of the barcode from an outside source (text/xml/etc), so this was simply a matter of having Drupal put the appropriate ID of the current hardware item into a file and automating ZebraDesigner to open and print it.
  6. NMS (Zenoss) Integration – The article of how we accomplished this can be found here.
  7. Automated Switch Configuration Backups and Network Tracking – This just took a little custom coding and was not as difficult as it might seem.  Once all our network switches were entered into the asset management system and we had each IP address, during the Drupal cron hook, we had the module cURL the config via the web interface of the switch by feeding it a SHOW STARTUP-CONFIG command (e.g. http://IP/level/15/exec/-/show/startup-config/CR) – which was saved and attached to the node.  Additionally, we grabbed the MAC database off each switch (SHOW MAC-ADDRESS-TABLE), and parsed that, comparing the MAC addresses on each asset to each switch port, and recording the switch/port location into each asset.  We could now see where each device on the network was connected.  A more detailed description of the exact process used for this may also be a future article.
  8. Help Desk – While this could have been accomplished with a custom content type and views, we chose to make use of the Support Ticketing Module, as it had some added benefits (graphs, email integration, etc)
  9. Public Address System – Our PA system can generate ICECast streams of its audio.  We picked these up using the FFMp3 flash MP3 Live Stream Player.
  10. Automated Gathering of Hardware Info – For this, we made use of a free product called WinAudit loaded into the AD login scripts.  WinAudit will take a full accounting of pretty much everything on a computer (hardware, software, licenses, etc) and dump them to a csv/xml file.  We have all our AD machines taking audit during logins, then dumping these files to a central location for Drupal to update the asset database during the cronjob.
  11. Active Directory Integration – The first step was to ensure the apache server itself was a domain member, which we accomplished through the standard samba/winbind configurations.  We then setup the PAM Authentication module which allowed the Drupal login to make use of the PHP PAM package, which ultimately allows it to use standard Linux PAM authentication – which once integrated into AD, includes all AD accounts/groups.  A little custom coding was also done to ensure matching Drupal roles were created for each AD group a user was a part of – allowing us to control access with Drupal (see #1 above) via AD groups.

There was a liberal dose of code within a custom module to glue some of the pieces together in a clean fashion, but overall the system works really smoothly, even with heavy use.  And the best part is, it consists of mainly free software, which is awesome considering how much we would have paid had we gone completely commercial for everything.

Please feel free to shoot me any specific questions about functionality if you have them – there were a number of details I didn’t want to bog the article down with, but I’d be happy to share my experiences.

Hardware Monitoring: Syncing Drupal with Zenoss

Overview

One of the more daunting tasks of managing a larger network is keeping track of all your devices – both physically, and from a network monitoring perspective.  When I arrived on the job 3 years ago, the first major task I laid down for myself was implementing both an asset management system, as well as a network monitoring system, to ensure we always knew what we had, and if it was functioning properly.

I decided almost immediately that Drupal was the right candidate for the job of asset management.  There are a number of commercial IT/helpdesk systems out there which work great, but they are usually fairly expensive with recurring licensing costs, and my history with them has always been shaky.  Plus, I find myself not always using all the functionality I paid for.  I knew with my Drupal experience, I could get something comparable up in almost no time – this is not a discredit to IT packages, but moreso the power of the Drupal framework.

Network Monitoring – Cue Zenoss

Now that I had the hardware DB taken care of, I needed a NMS for monitoring.  Originally I was planning on Nagios, but a contractor who works for us (now friend) had introduced me to Zenoss, another open source alternative.  Zenoss is awesome – is absolutely has its quirks, and is not the most intuitive system to learn, but once things are up and running it’s great – and tremendously powerful.  So the choice was made.

Now – I had both pieces, but I absolutely hate entering data twice, and the interoperability guy in me loves integrating systems.  So I decided to write a script that would sync our Drupal database with Zenoss.  Drupal would serve as our master system, and any hardware we entered into it would automatically port over to Zenoss.  Any changes or deletions we made (IP address, location, name, etc) would sync over as well.

The below script performs this synchronization.  Some warnings up front – I’m not a Python guy by any means, I specifically learned it for this script, so I apologize for any slopping coding or obvious Python-y mistakes.  I’ve tried to thoroughly comment it to document how to use it and how it works.  Hopefully it can help some others out as well!

# Description: Sync devices to be monitored from Drupal to Zenoss
#
# Setup Work: Create a (or use an existing) content type that houses your hardware items to be monitored.
# They should have CCK fields for the IP address of the device, the name, and the type of
# device it is. The device type will determine the Zenoss class the script adds it to, and hence
# the kind of monitoring it will receive (e.g. Linux server, switch, ping only, etc)
#
# Additionally, in Zenoss, create a custom property field that will house the nid of the Drupal
# node. This serves as the foreign key and will be used to link the item in Drupal to its entry in Zenoss
#
# Usage: This script should be run from zendmd, and may be run once or periodically. We run it every 20 minutes from
# a cron job.
# It will create new entries in Zenoss for items not yet imported, delete ones that no longer exist in
# Drupal (it will only delete ones that were originally imported from Drupal), and will update ones that have
# been updated (type, IP, location, etc).
#
# Note: Excuse all the extra commits - we experienced some issues with data not being saved, and I threw some extra in
# there - they're almost definitely not necessaryimport MySQLdb

# Take a taxonomy term from Drupal identifying the type of monitoring to be done,
# and convert it to the appropriate Zenoss class path. Update these to whatever terms
# and Zenoss class paths that make sense for your environment. We setup ones for
# Linux and Windows servers, switches, waps, UPSes, PDUes, etc, as can be seen.
def getClassPath(passType):

if passType.lower() == "windows":
return "/Server/Windows"
elif passType.lower() == "linux":
return "/Server/Linux"
elif passType.lower() == "switch":
return "/Network/Switch"
elif passType.lower() == "mwap":
return "/Network/WAP/Managed"
elif passType.lower() == "uwap":
return "/Network/WAP/Unmanaged"
elif passType.lower() == "ups":
return "/Power/UPS"
elif passType.lower() == "pdu":
return "/Power/PDU"
elif passType.lower() == "camera":
return "/Camera"
elif passType.lower() == "cphone":
return "/Network/Telephone/Crash"
elif passType.lower() == "sphone":
return "/Network/Telephone/Standard"
elif passType.lower() == "printer":
return "/Printer"
elif passType.lower() == "converter":
return "/Network/Converter"
elif passType.lower() == "ping":
return "/Ping"
return "/Ping"

# Connect to Drupal's MySQL DB (Replace these values with the appropriate ones for your system)
imsConn = MySQLdb.connect(DRUPAL_MYSQL_SERVER, MYSQL_USER, MYSQL_PASSWORD, MYSQL_DB)
imsCursor = imsConn.cursor()

# Execute the query to grab all your items to be monitored. In our case, we have a node type called "hardware" that had CCK fields identifying the IP address,
# the type of hardware (a taxonomy term that dictated the Zenoss class of the item - see getClassPath above), a physical location, etc.
# You'll want to change the specific table/field names, but the inner join will probably stay, as you'll want to grab both the node and CCK fields that belong to it.
imsCursor.execute("""
SELECT node.nid, content_type_hardware.field_hardware_dns_value, content_type_hardware.field_hardware_location_value, content_type_hardware.field_hardware_ip_value, content_type_hardware.field_hardware_monitor_type_value, content_type_hardware.field_hardware_switchname_value, content_type_hardware.field_hardware_switchport_value
FROM node
INNER JOIN content_type_hardware ON node.nid = content_type_hardware.nid
""")

# Loop through all returned records - Check for additions, changes, and removals
while (1):
#tempRow is our current hardware item record
tempRow = imsCursor.fetchone()
if tempRow == None:
# No more entries, break out of loop
break
else:
# Search Zenoss records for the nid of the hardware item. A custom field will need to be created in Zenoss to serve
# as this foreign key. In our case, we used MHTIMSID - but you can use anything you'd like - just be sure to create the field in Zenoss.
found = False
for d in dmd.Devices.getSubDevices():
if d.cMHTIMSID != "":
if int(d.cMHTIMSID) == tempRow[0]:
found = True
break

if found == False:
# Hardware item not found, add it if it's monitored
if tempRow[4] != None:
dmd.DeviceLoader.loadDevice(("%s.yourdomain.com" % tempRow[1]).lower(), getClassPath(tempRow[4]),
"", "", # tag="", serialNumber="",
"", "", "", # zSnmpCommunity="", zSnmpPort=161, zSnmpVer=None,
"", 1000, "%s (%s - %s)" % (tempRow[2], tempRow[5], tempRow[6]), # rackSlot=0, productionState=1000, comments="",
"", "", # hwManufacturer="", hwProductName="" (neither or both),
"", "", # osManufacturer="", osProductName="" (neither or both).
"", "", "", #locationPath="",groupPaths=[],systemPaths=[],
"localhost", # performanceMonitor="localhost',
"none")
tempDevice = find(("%s.yourdomain.com" % tempRow[1]).lower())
tempDevice.setManageIp(tempRow[3])
commit()
# Save nid to Zenoss record (to serve as foreign key) for syncing
tempDevice._setProperty("cMHTIMSID","MHTIMS ID","string")
tempDevice.cMHTIMSID = tempRow[0];
commit()
else:
# Hardware item found - delete, update, or do nothing
if tempRow[4] == None:
# Delete if not set to monitor
dmd.Devices.removeDevices(d.id)
else:
# Update DNS and IP to current values
if d.getDeviceName() != ("%s.yourdomain.com" % tempRow[1]).lower():
d.renameDevice(("%s.yourdomain.com" % tempRow[1]).lower())
if d.getManageIp() != tempRow[3]:
d.setManageIp(tempRow[3])
commit()

# Change class if not set to "Manual" (We setup a taxonomy term called "Manual" that would turn off automatic Zenoss class selection during syncing
# and allow us to manually specificy the class of the device.
if tempRow[4] != "Manual":
d.changeDeviceClass(getClassPath(tempRow[4]))
commit()

# Update comments (location change)
d.comments = "%s (%s - %s)" % (tempRow[2], tempRow[5], tempRow[6])
commit()

# Save any missed changes
commit()

# Close connection to database
imsCursor.close()
imsConn.close()

Best Modern Practices – Cisco MDS 9000 (Fibre Channel) – Part 2

Back to Part 1…

Use Your MDS to Its Full Potential!

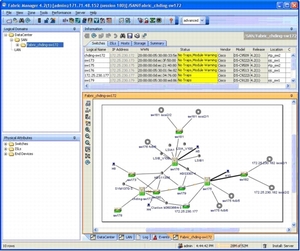
If you’ve taken some time looking through all the thousands of things NX-OS and Fabric Manager can do, you’ll know that the MDS line is amazingly powerful. I’m totally a CLI guy, and I do most of the basic switch configuration in NX-OS, but don’t hesitate to the abuse the hell out of Fabric Manager – it’s a fantastic tool for getting a visual representation of your Fibre Channel infrastructure. And, it gives you a quick visual (both in a textual list and graphical layout) into exactly what device is plugged into what port.

Example FabricManger Layout

Perhaps older switches couldn’t report what device was attached to what port, but if there is no pragmatic need for port zoning, then I believe it shouldn’t be used, as it is NOT aligned to the purpose of zoning. The conceptual purpose of a zone is to define security at the device level – i.e. what device can talk to what device. The purpose is not to be a mechanism for port security. Port security exists at a lower level (or more appropriately, layer, if we think in terms of an OSI-esque model), and should be handled separately and independently.

port-security ENABLE!

The engineers at Cisco are pretty smart people, and they understood the need for port security in a WWN zoning environment. They understood that we, the administrators, deserve the best of BOTH worlds, and they gave it to us. Not only can you configure what WWNs are authorized to be on what physical ports with port-security, but you can also have the MDS automatically learn what devices are currently connected, and set them up as authorized WWNs, expire them, auto-learn new devices, etc.

What does this mean? Quite a bit. We get the ease (and conceptual correctness) of managing zone membership by WWN, MUCH easier migrations, an instant snapshot of exactly what device is connected to what port, and the security of Cisco’s standard port-security mechanism. Maybe I’m crazy (okay, I’m pretty sure I am), but I’m a firm believer that WWN zoning is completely the way to go.

Device Aliases Rule, FC Aliases Drool

A key to making Fabric Manager work the best for you (especially if you’re dealing with a pure Cisco fabric), is to make heavy use of Device Aliases and say goodbye to FC aliases. There are a number of reasons for this, but mostly center around the fact that Device Aliases can be used in most sections of the MDS configuration where pWWNs are used, whereas FC aliases are pretty much per vsan and for zone membership only. Not only does this make configuration easier, but Fabric Manager makes heavy use of the device alias (remember above when we were talking about having Fabric Manager show you what devices are connected to what physical ports? Device Aliases make this work, as then you get a nice readable name instead of a pWWN). Additionally, for you CLI guys and gals, anywhere in the config that a pWWN with a Device Alias is mentioned, NX-OS prints the Device Alias right below it, which is extremely helpful while trudging through lines and lines of WWNs.

You may be stuck with FC Aliases if you have a hybrid switch environment with something other than Ciscos, but otherwise, it’s time to ditch FC Aliases.

Single Initiator, Single Target Zoning

It’s a little more work than making big easy zones with lots of members – but it’s honestly the safest and most technically efficient method of zone operation. There are some times when it becomes necessary to include multiple initiators/targets in failover clusters or other special cases, but other wise – make your zones 1 to 1. This ensures that there is no extra traffic in the zone, protects your other zones in the event that one of your HBAs malfunctions – and safe guards your remaining connections from a server to other SANs should you screw up the configuration in one of the zones. It’s extra work, but it’s worth it.

Feedback!

Most of these are based off of best practices gleaned from Cisco, VMware, and Compellent – but as mentioned, there are debates out there surrounding many of them. Please feel free to share your Fibre Channel thoughts or experiences, I think this is definitely an area that deserves more attention.

Best Modern Practices – Cisco MDS 9000 (Fibre Channel) – Part 1

We recently got a pair of shiny new Compellent SANs at work – both a primary and DR setup which replicate to each other. Seriously awesome stuff (Sales pitch mode – I don’t work for Compellent, but they make an amazing product, and Data Progression in the bomb. Check them out if your organization is in the market).

Part of the migration and installation process included switching out our old Cisco 9020 Fibre Channel switches for 9124s, as the 9020s do not support NPIV. If you’ve ever had to replace your entire Fibre Channel infrastructure, you’ll know it can be kind of a bear, depending on the size. However, it does present a rare opportunity to make some major reconfigurations and restructuring. For us, our previous zoning setup was a little funky and needed to be tightened up a bit, so this was the perfect time.

A Little Knowledge Can Be a Dangerous Thing

One of my issues going into this situation was my lack of fibre channel knowledge. I understood the basic premise behind zoning, but I had never done major switch configuration, and had always relied on the storage vendor in question to help out. While Compellent was very helpful during the install, I knew I wouldn’t find any better opportunity to drive full on into Fibre Channel joy and learn everything I could. And I definitely came away with some interesting tidbits.

Zoning Semantics

There are many FC related debates, but one stems around Hard vs Soft zones and Port vs WWN zones. Unfortunately, a lot of the confusion stems around the fact that people mistakenly interchange the zoning phrases hard for port, and soft for WWN. This is incorrect – port zoning is not the same thing as hard zoning, and WWN zoning is not the same as soft zoning! I have seen a few theories on why people have treated them interchangeably over the years: Some older switches matched the two functionalities together (e.g. you could only port zone through hardware, and WWN zone through software), or people just hear the word “hardware” and automatically think “physical port”, or people just learned it that way, etc.

In truth, hard zoning simply means that the segmentation is enforced in ASIC hardware, and there is absolutely no way for out-of-zone traffic to occur. Soft zoning is security performed in software by consulting the name server on the director – and is not as secure as hard zoning – if an initiator knows (or guesses) the target WWN, they can communicate with it, the switch hardware doesn’t prevent the packet from reaching the destination, even though the initiator doesn’t share a zone with it. For example, if Google wanted to hide their website by deleting their domain name “google.com”, I could still get there if I knew their IP address. It’s not very difficult to brute WWNs – like MAC addresses, they are assigned by vendor, and are most likely produced sequentially. Lookup the vendor prefix, and you’re already half way there. For this reason, hard zoning should always be used, regardless if port or WWN zoning are used.

Port vs WWN, Round 1, FIGHT

Now that we’re using the correctly terminology, the heart of the debate is whether one should use port or WWN based zoning. In port based routing, the physical port itself is a zone member. Any device plugged into it will be in the zone. Move a device to a different port, and it is no longer in that zone. In WWN based zoning, the WWN of the device is a zone member. For this reason, no matter what port you plug the device into, it will be in the zone.

Both have pros and cons:

Port Based: PRO – security is tighter. WWNs are easily spoofed, but an intruder would need to physically unplug the current device from the physical port and plug a new one in to jump onto the zone – which would be noticed for a number of reasons. CON – you need to keep track of what physical ports each device is plugged into. If you ever replace your switches, this means a lot more work.

WWN Based: PRO – since zone membership is recognized by WWN, it doesn’t matter what port the device is plugged into, which means less headache trying to keep track of what is plugged into what port (especially during an install/migration). CON – less secure, as WWNs can be spoofed, as mentioned above.

Now – I’ve read a number of articles that say WWN based zoning is unmanageable because you don’t know what device is plugged into what port, and the security is bad because WWNs are spoofable, no respecting storage administrator would ever use WWN zoning, it’s lazy, evil, unpatriotic, etc. What I say to this: POPPYCOCK!

Why Did Toni Just Say POPPYCOCK!? Find out in Part 2…

Ping Failover Daemon for Linux

Overview

I wanted to make available a GPL daemon I developed for Linux called the “ping failover daemon”, or pfailover. It is designed for hosts with two or more network interfaces, with the goal of rerouting traffic over the secondary interface when the primary fails. It achieves this by monitoring a host over the primary connection via ping, and changing the route tables when it doesn’t receive a response. In this way, it is smart enough to reroute if any hop along the way fails, as opposed to rerouting only under the circumstances of a link-loss. When it starts receiving responses to the host over the primary interface again, it restores the route tables, thereby activating the primary connection again.

The daemon also runs scripts whenever a connection is changed, so you can insert any functionality you want, such as sending out a warning email to the IT team saying something’s up.

Additionally, it allows you to setup as many monitors as you’d like, if you have complex setups with 3 or more network interfaces, or reroute in a different fashion depending on which monitored host goes down.

For programmers and scripters, it also allows full monitoring and control via the command line and shared memory, allowing other programs to integrate its functionality.

The Reason for Development

A few months back, we ran into an interesting situation at work. We had only had T1s for an Internet connection for the longest time, but we decided since broadband was so cheap for the bandwidth, we would also get a cable modem – mainly to be used for staff web traffic. At the same time, it was a great opportunity to setup a proxy server as the gateway to this new, speedy connection. Not only would this give us an additional speed boost due to caching, but would also allow us to do some management over web use.

As anyone with a cable modem knows (well, at least with Comcast) – connection loss and downtime are not questions of if, but rather when – and when I say “when”, I really mean how many times a week. Which is fine – there is a reason why organizations still go with T-carriers and not just broadband connections – they’re more expensive, but more reliable as well.

Anyway, with this in mind, we knew that it was just a matter of time before the proxy server lost its connection to the Internet via the cable modem, and staff would start complaining about Internet loss. And at the airport, uptime is a big deal, which is especially difficult being a 24×7 operation. While there are a few strategies on how to handle this, I decided I wanted a simple solution – the proxy server would simply reroute its web requests back out the internal network connection to the T1s, instead of to the cable modem connection. Then when the cable modem came back online, it would start routing back out that interface again.

I found some other packages to do this, but they were all very robust, complex, and just too big for what I wanted – I wanted a lightweight daemon with scripting ability, so I could start out simple, and grow it complex if necessary. So I decided it would be a fun project to code one up in C++ – I rarely get to write any C++ code anymore, so I take the opportunity when I can.

Installation and Usage

You will need the lastest version of the boost libraries to compile pfailover. The installer includes sample conf and script files to aid in setup – plus it’s fairly straightforward and should only take a few minutes to configure. You can see all the options by typing “pfailover –help”. Normally, after configuring it, you’ll want to run it as a daemon with the “pfailover -d” command. Once running, you can check the current status at any time by typing “pfailover -s=get:0”.

Download pfailover 0.4.1

How to Move the COS (esxconsole.vmdk) in VMware ESX 4 (vSphere)

We recently upgraded from ESX 3.5 to vSphere at work, and man – is it awesome. The infrastructure manager (vSphere Client) supports a whole boatload of new options for better monitoring and managing your VMs and clusters – including a patch management system for keeping your VMs and hosts up to date. If you’d like the full details of all the new features, check out the VMware page here.

The Console OS

One new aspect of vSphere is it separates out the hypervisor from the service console to a greater degree, actually creating a VM for the console. Great from an architectural point of view – however, one gotcha is where it actually STORES this VM. During the upgrade (and I’m assuming new install process), it asks where you’d like to store this Console OS VM. It suggests you store it on local storage, but you can just as easily store it in a Datastore on your SAN. Which is what I (and others judging from the web) chose as an option.

An issue arises in that there is no easy way (that I know of, after scouring the web for ages) to move the console VM in the future. We recently needed to redo all the LUNs on our SANs, which meant we needed them empty – which is when we ran into this issue. The service console was on the SAN with no good way to move it.

The Solution

First off – proceed at your own risk. [UPDATE] When asking VMware support about this solution, they said it works, but is not officially supported. [END UPDATE] So far we’ve had no issues, but that’s not to say in 2 months our whole ESX cluster won’t detonate, showering death and destruction down on us. That being said, I think we’re pretty safe.

This question has been asked before, and everyone on the VMware forums said you needed to reinstall your ESX server to move the console VM – this is the official stance by VMware as well. I originally decided to do a little digging though, as it just seemed like there must be some way of doing it. It was just a file that needed to be moved, and the underlying OS is Linux, so I guessed it was all being done through scripts. I was right.

If you take a look at /etc/vmware/esx.conf on your ESX host in question, you’ll see all your configuration options. One of which is

/boot/cosvmdk

This points to the path and filename of the service console. This value is later used by the initialization script “/etc/vmware/init/init.d/66.vsd-mount” to mount the service console. We can change this value to anything we want, inclung a new location.

  1. Identify the correct service console VM for the ESX server in question. This isn’t an issue if you’ve got 1 ESX server, but if you’ve got a cluster, it’s not always clear the one in question. The console VM is stored with the name “esxconsole-<uuid>”. You can find the unique identifier/cos vmdk filename for your server within the /etc/vmware/esx.conf file.
  2. Identify the Datastore where you want to keep the service console. Take VMware’s advice and keep it on local storage – that way, if your SAN dies or you need to do maintenance, you aren’t in a pickle. Look in /vmfs/volumes and write down the ID of the storage you want to use.
  3. Put the ESX host in question into service mode – you’ll need to reboot it to perform the move, and you’ll need local access as it won’t reboot to a point where you have ssh.
  4. Make a backup copy of /etc/vmware/esx.conf in case you make a boo-boo.
  5. Edit /etc/vmware/esx.conf and change the path for the “/boot/cosvmdk” option to point to the new Datastore you recorded in #2. Save the conf file.
  6. Reboot the server. It will go smoothly until it hits the point where it attempts to mount the COS – at this point, it will choke as it can’t find esxconsole in the new place you told it to look. At this point, you’ll get a shell prompt.
  7. Do a recursive copy of the esxconsole-<uuid> directory from its old location to the new location. You should have all your /vmfs/volumes mounted since this takes place in the initialization sequence before the COS is mounted. [UPDATE] Jim points out that while local and FC storage will be available, it looks like iSCSI mounts take place later in the boot process, so they will not. Just a heads up if you’re planning on moving your COS to/from iSCSI [END UPDATE]
  8. Reboot. It should boot back up completely at this point. Ensure life is good, and then delete the old copy of the esxconsole-<uuid> directory.
  9. Ensure ESX automatically updated any other values to the new path (like /adv/Misc/CosCorefile)

Please don’t hesitate to comment with your experiences or if you know a better way to handle this (or if this solution could cause issues). Good luck!

IAS Shared Secrets Aren’t So Secret

Though by night I practice in the dark arts of computer science and engineering, during the day I play the part of a mild mannered network administrator. Recently I was taking stock of our backups, and as I was looking through some items that needed to be included in the nightly routine, I checked out our IAS server. We run IAS as we have a number of RADIUS clients, such as switches and other devices, that we like to have authenticate against our Active Directory. RADIUS connected to AD via IAS is super sweet, as there are quite a number of devices out there that support RADIUS, and you can get pretty detailed with the authentication rules of what is and isn’t granted access.

In IAS, to establish trust between the server and the RADIUS client, an administrator sets up a shared secret – basically a password that both ends agree to use to prove they are who they say they are during communication. Normally, you would expect such a password to at least be encrypted, or at least obfuscated in some manner to add a level of protection to snooping eyes. Microsoft has however, to my surprise, decided not take this route.

Viewing Shared Secrets

IAS stores its settings in two files under C:\windows\system32\ias – ias.mdb and dnary.mdb. If you’re a database user, you’ll notice mdb being the file extension used by Jet/Access databases. For the heck of it, being a tinkerer, I decided to link to these files with MS Access and see what I could see. They are indeed standard Jet databases – which is pretty neat from an integration perspective – with a simple ODBC connection you can read/write your IAS settings. There is a table called “Objects” that contains an entry for each one of your RADIUS clients. What was a little surprising, however, is there is a field labeled “Shared Secret” that contains, in very clear text, the shared secret password for each RADIUS client.

Now while users shouldn’t have access to this file normally, having a big, easy to use database full of passwords always makes me a bit nervous. Understandably hashing might not have been an option due to the need to deduce the original cleartext – but where authentication is involved, a little encryption would be nice, to at least dissuade the average script kiddie.

Not the security hole of the century, but certainly something to be aware of.